Introduction
In today’s cloud-driven world, manually creating infrastructure is not only time-consuming but also prone to errors. This is where Infrastructure as Code (IaC) comes into play. Using tools like Terraform, you can automate the provisioning of cloud resources with consistency and efficiency.
Terraform allows you to define your infrastructure in simple configuration files and deploy it across multiple cloud platforms. Whether you’re working with virtual machines, networking components, or storage, Terraform ensures that your environment is reproducible and easy to manage.
In this blog, we will walk through the step-by-step process of creating an instance using Terraform, making it easy for beginners to understand and implement automation in real-world scenarios.
Step 1: Initiate a Resource Plan
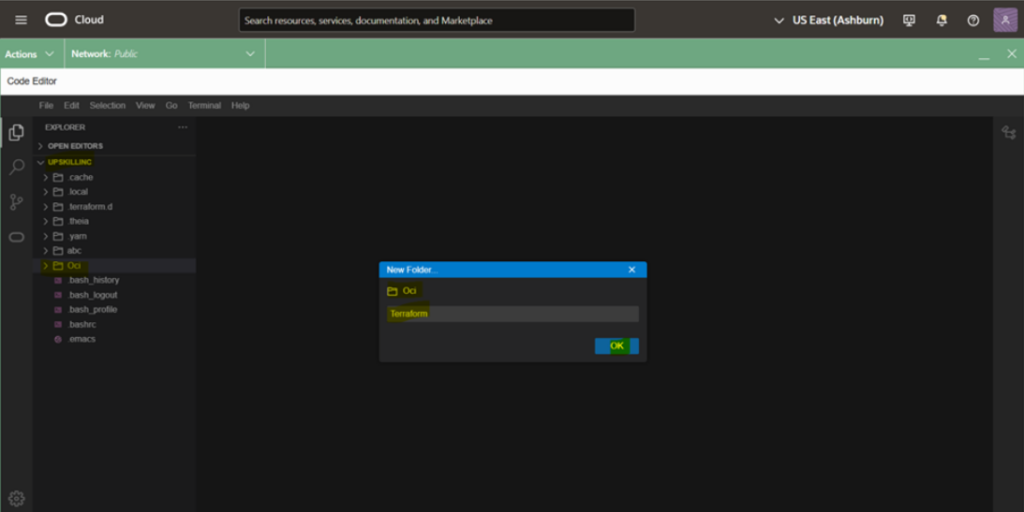
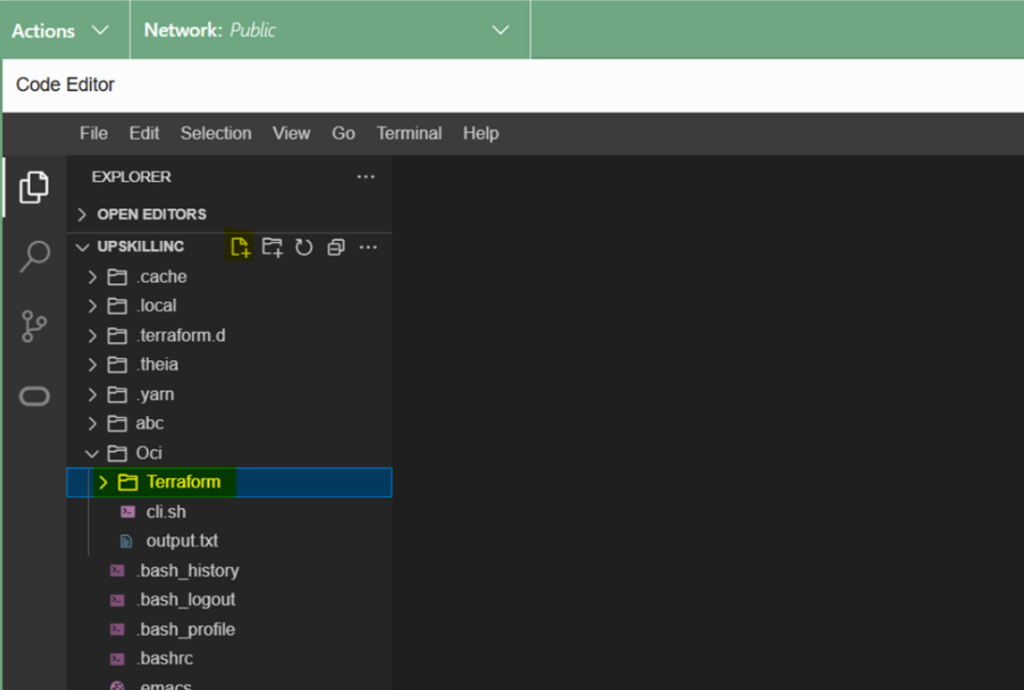
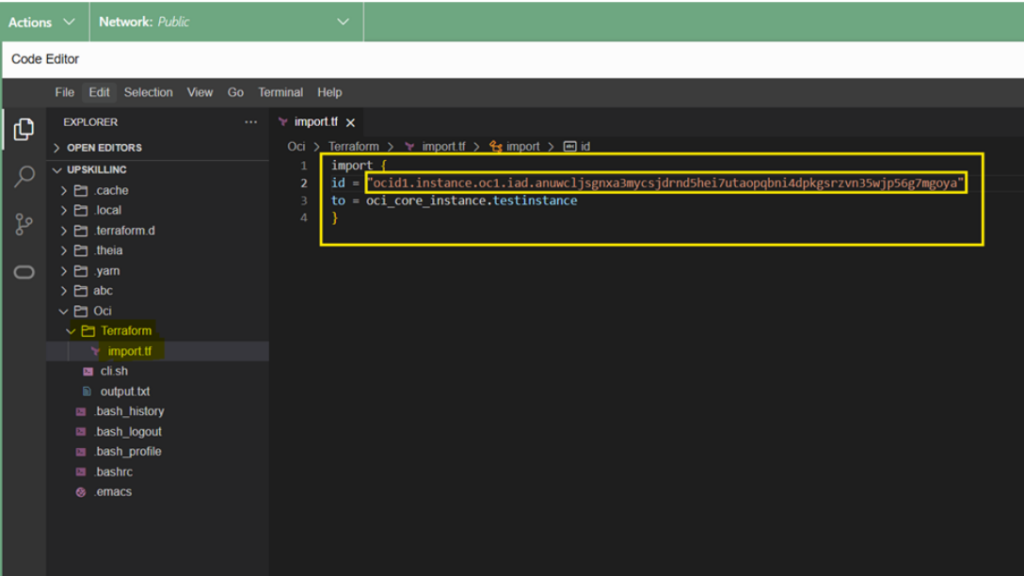
Open the code editor in OCI and create a file within a folder named ‘terraform‘.
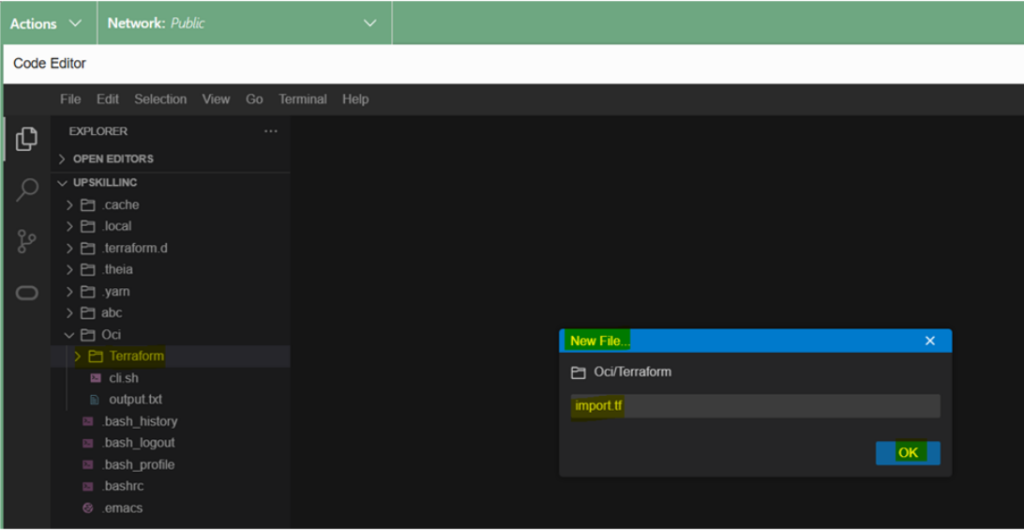
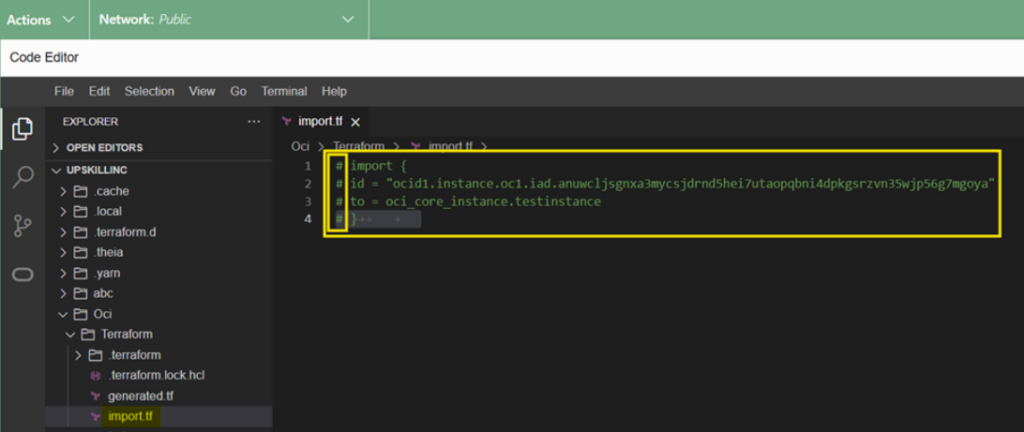
and then create a file named import.tf
Write below command in import file:
import { id = "ocid1.instance.oc1.iad.anuwcljtgnxa3myc3d6ixwoyfzihsxkzwf6gghvblcwfb3rvggwyzxsk2n4a" to = oci_core_instance.testinstance }
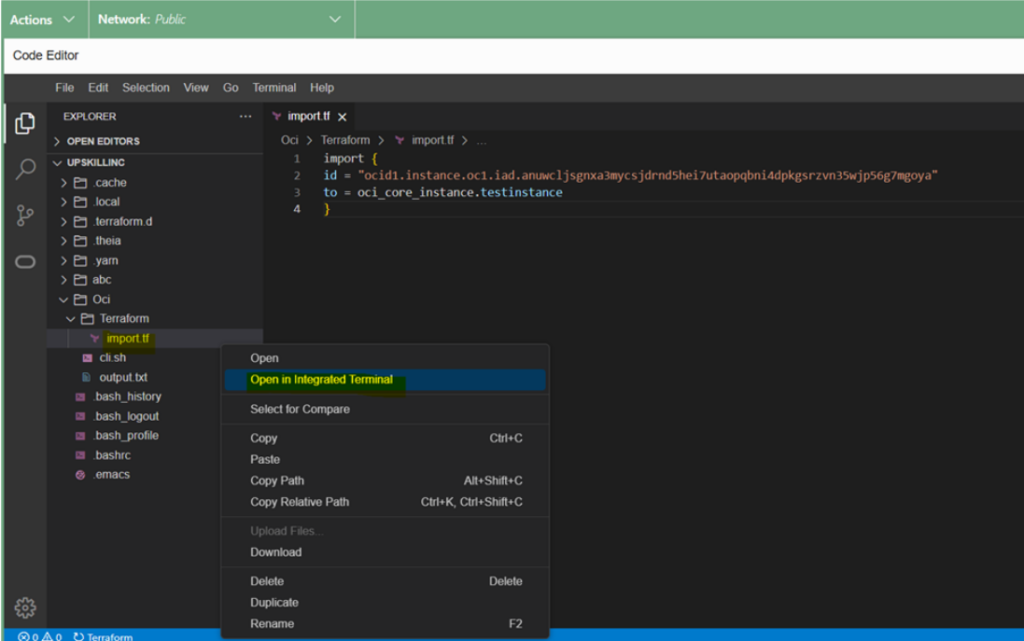
Now, Right click on import.tf file and select open in integrated terminal
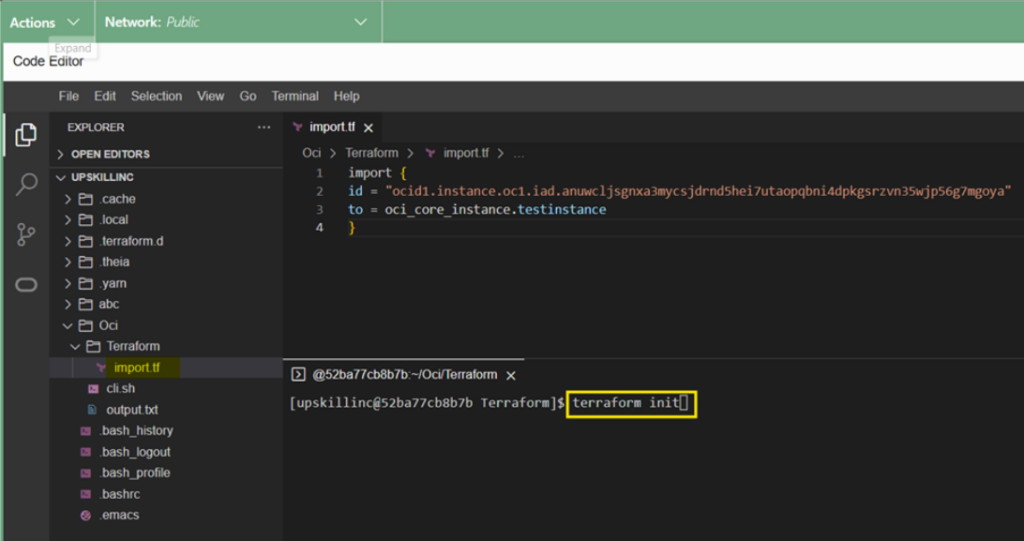
Run
terraform init

#command to initialize Terraform configuration file.
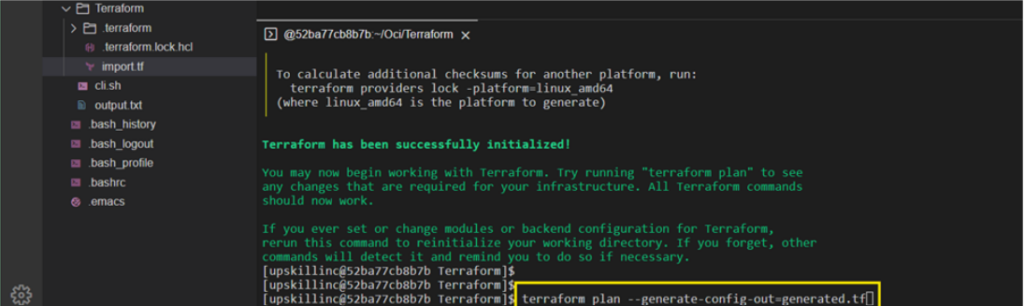
As we can see Terraform is initialized now

Now, Run command
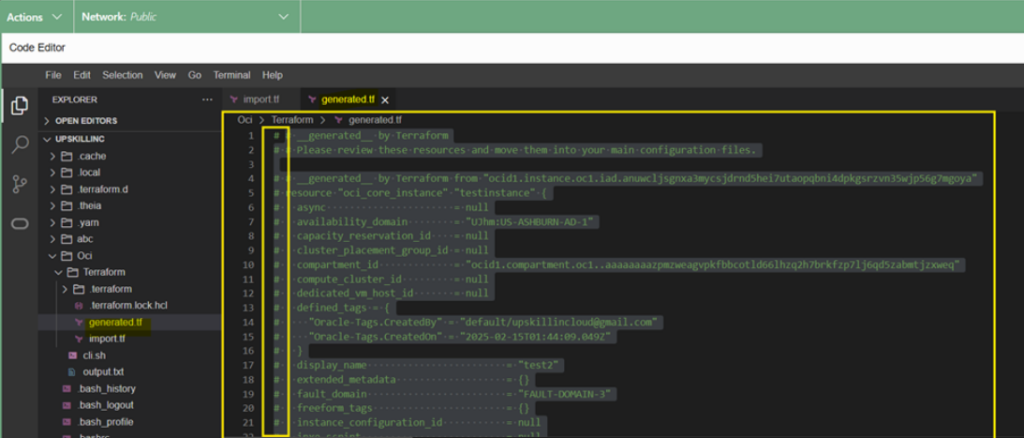
terraform plan --generate-config-out=generated.tf

#to creates an execution plan and it saves the resulting configuration of the plan into a new file called generated.tf.
As we can see A new file named generated.tf is created with execution plan

Now we place # before the import.tf command in the code editor,
it becomes a comment. This effectively hides the command from being executed.
Create a file with a name that matches the instance you want to execute. Here I am created file named testinstance.tf
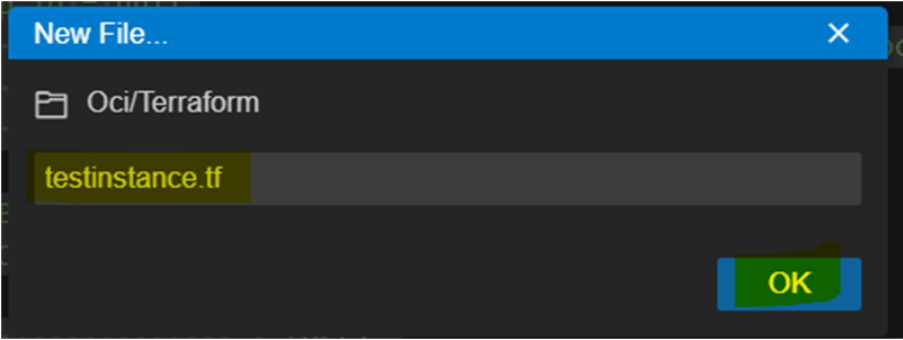
Here testinstance.tf file is created
and now we will copy paste the execution plan in testinstance.tf file from generated.tf file
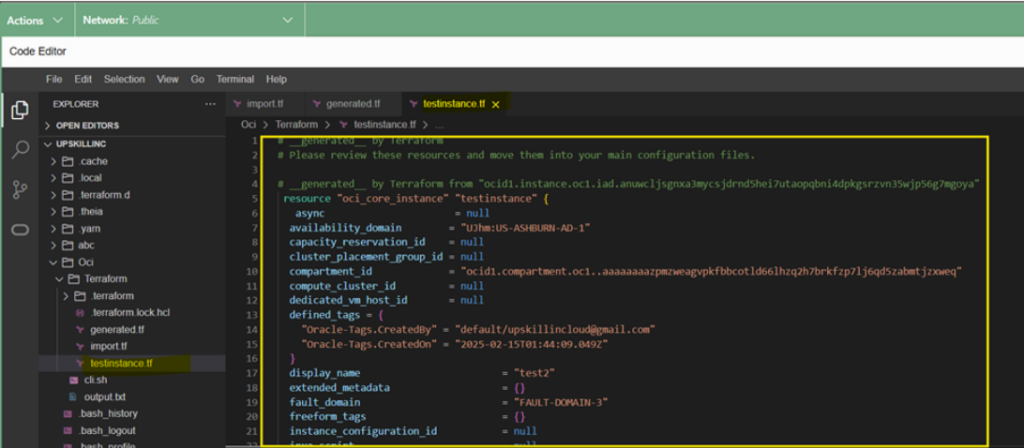
and after copy paste the execution plan, we place # before every line in the generated.tf file it becomes a comment. This effectively hides the command from being executed.
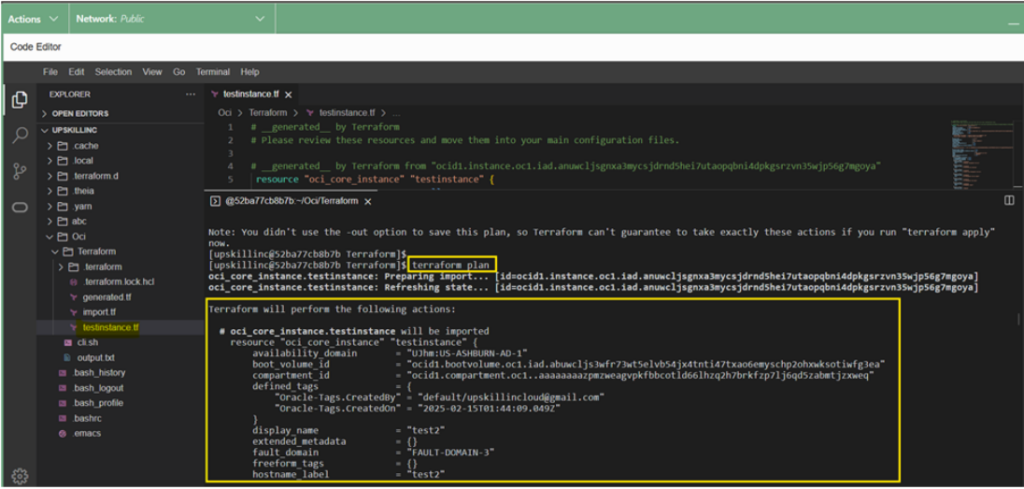
Now Run
terraform plan

#command to provides a clear and detailed execution plan and ensures that you have a clear understanding of the changes before they are made, reducing the risk of errors and unintended consequences.
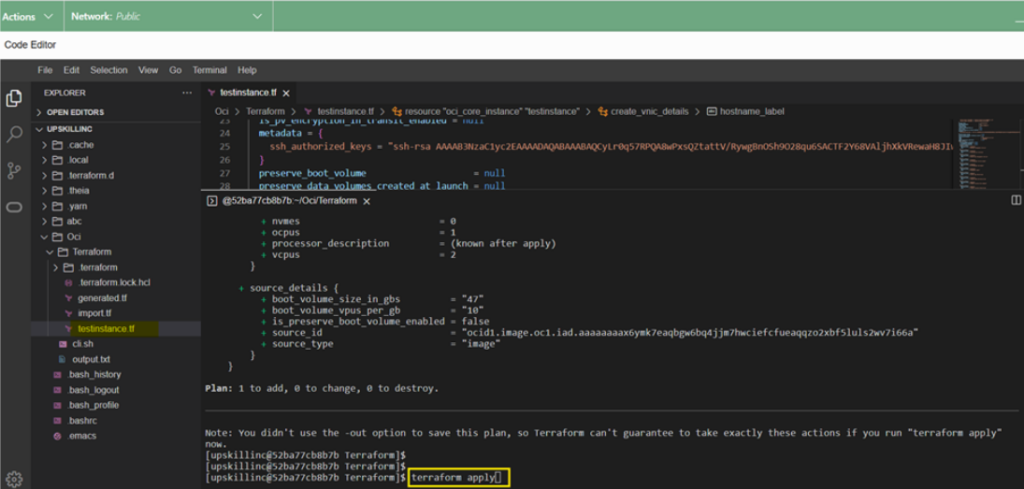
Step 2 : Create an Instance1
Once we review all the details and make any necessary changes, we proceed by running the command
terraform apply
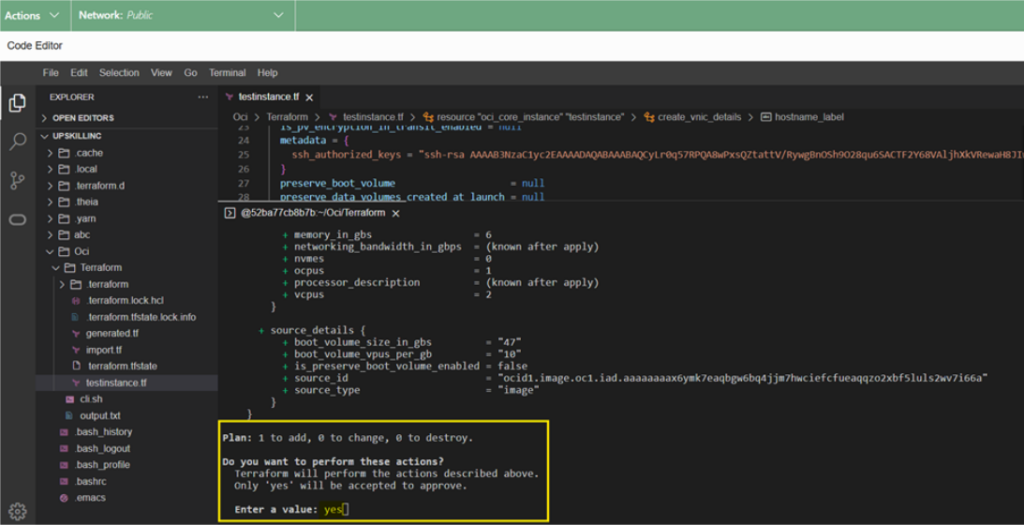
Now, enter Yes to confirm and apply the plan.
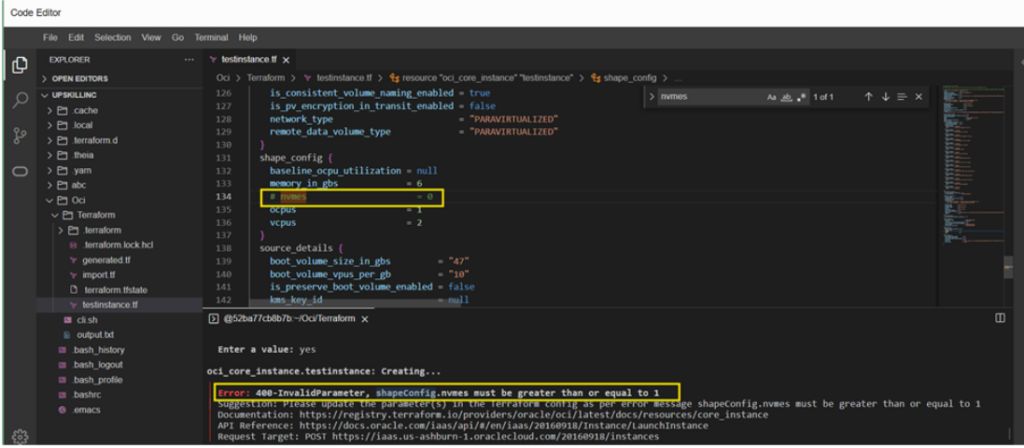
**Occasionally, ** we encounter errors during this process. Let’s address and resolve these errors.
- Error 1 : shapeconfig.nvmes

Solution : Place # before nvmes in the testinstance.tf file
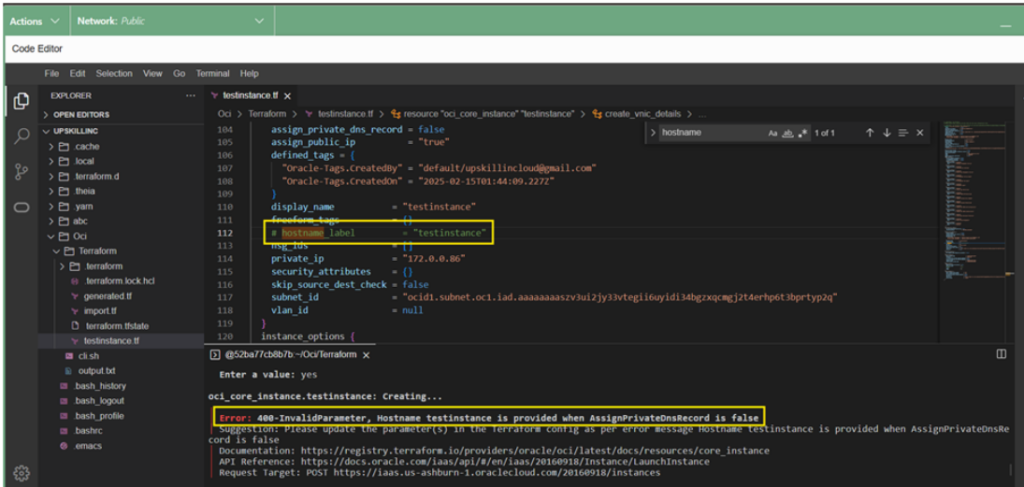
- Error 2 : Hostname
Solution : Place # before hostname in the testinstance.tf file
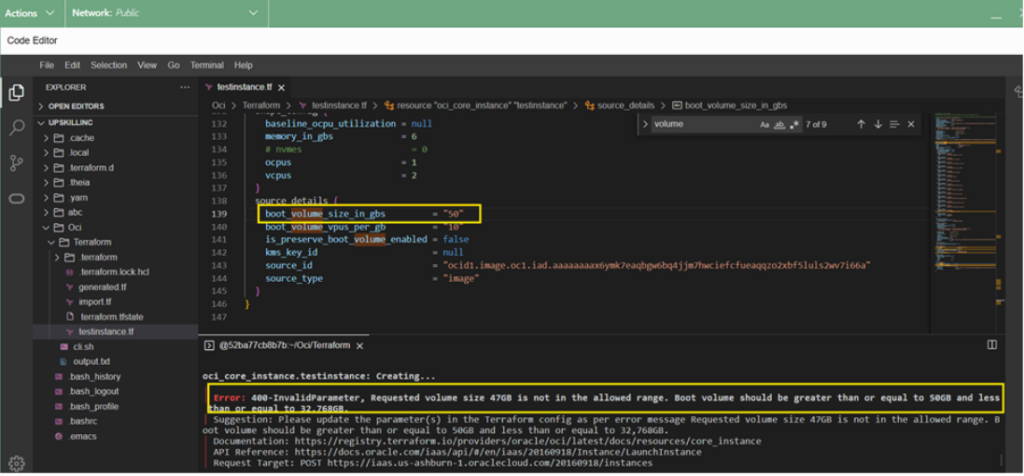
- Error 3 : Boot volume size
Solution : Increase the size of boot volume from 47 gb to 50 gb in testinstance.tf file
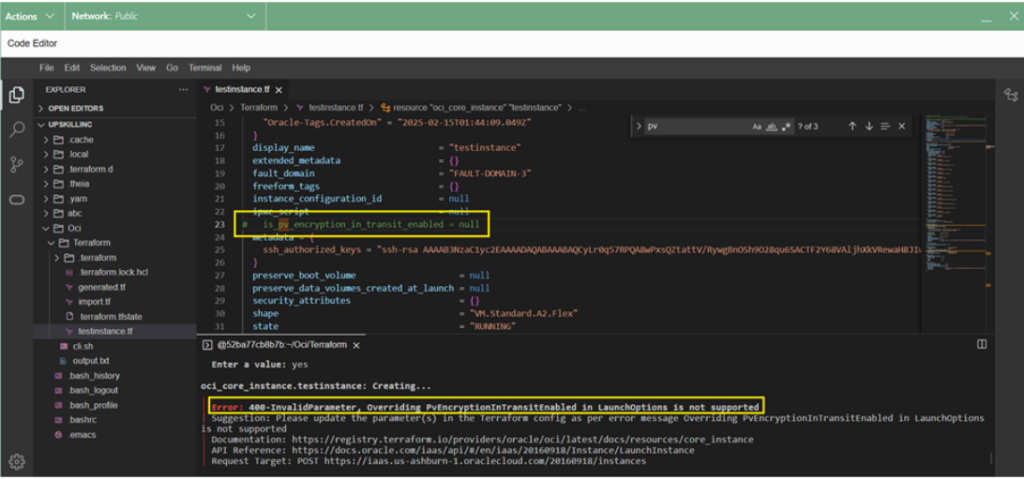
- Error 4 : PV encryption in transit enabled
Solution : Place # before PV encryption in transit enabled in the testinstance.tf file
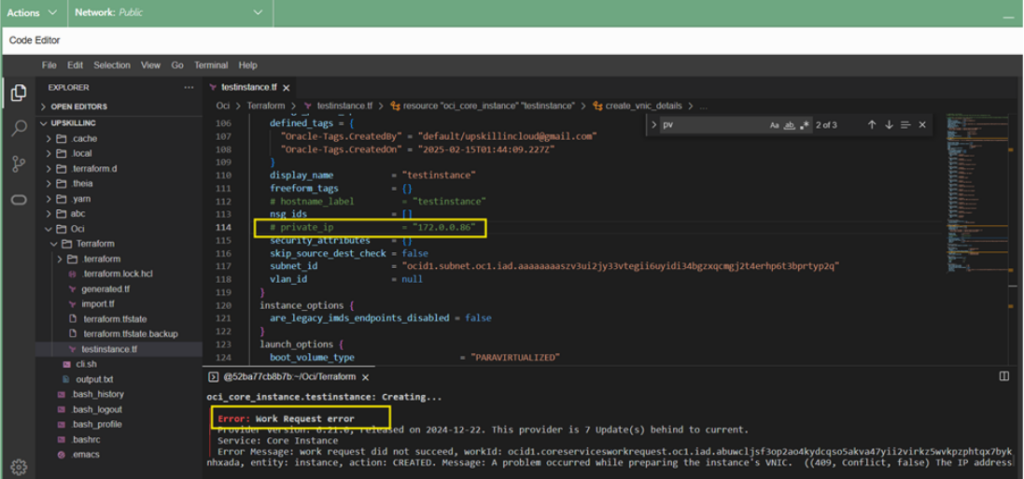
- Error 5 : Private IP
Solution : Place # before Private IP in the testinstance.tf file
Again Run
terraform apply
and enter “Yes”
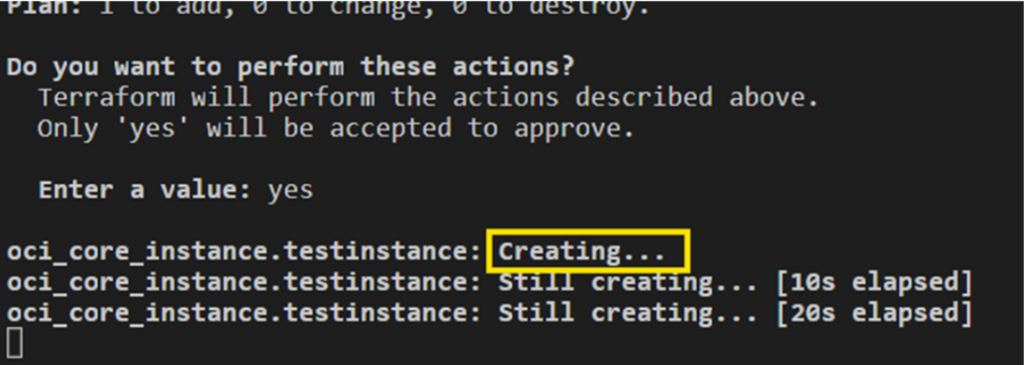
Instance is created now.

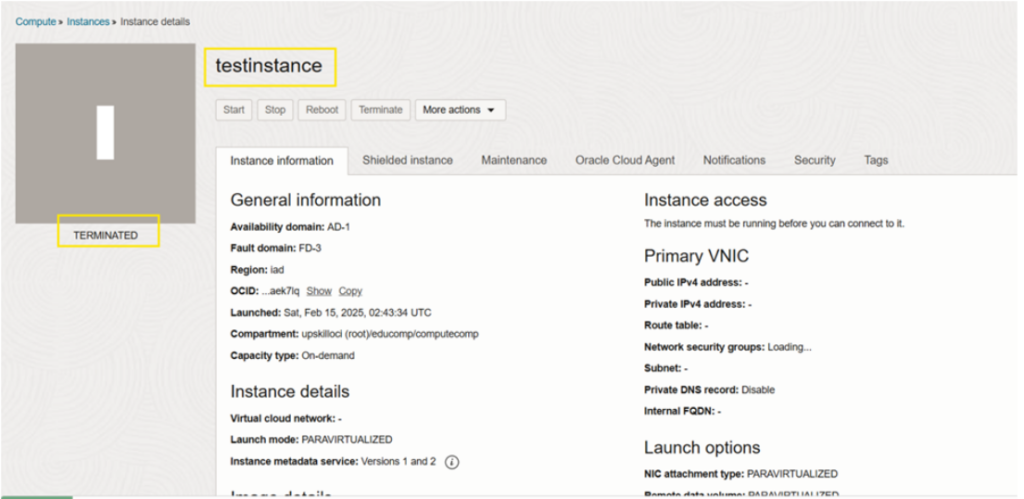
We can see in OCI console also, Testinstance is created.
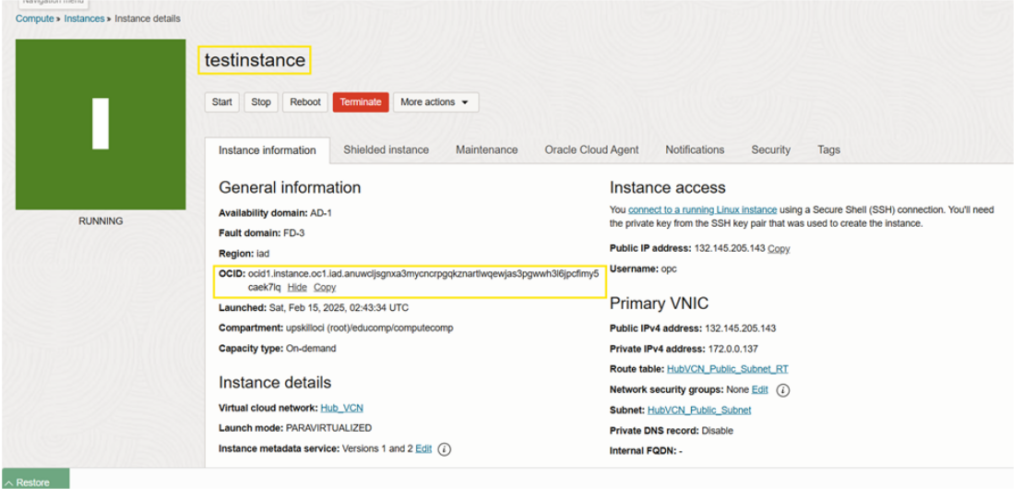
Hence, the instance is created successfully and now lets check how to termiate the same.
#Step 3 : Terminate an Instance
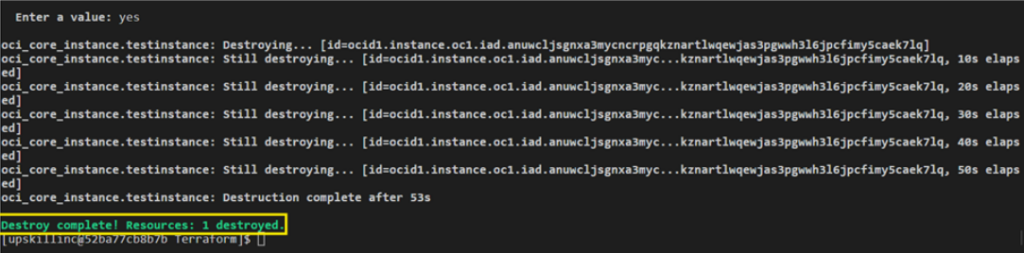
Run
terraform destroy
command to terminate the Instance from backend using terraform

Enter ‘Yes‘ to initiate

Instance is destroyed
testinstance is Terminated As we can see in console as well